Kid Friendly
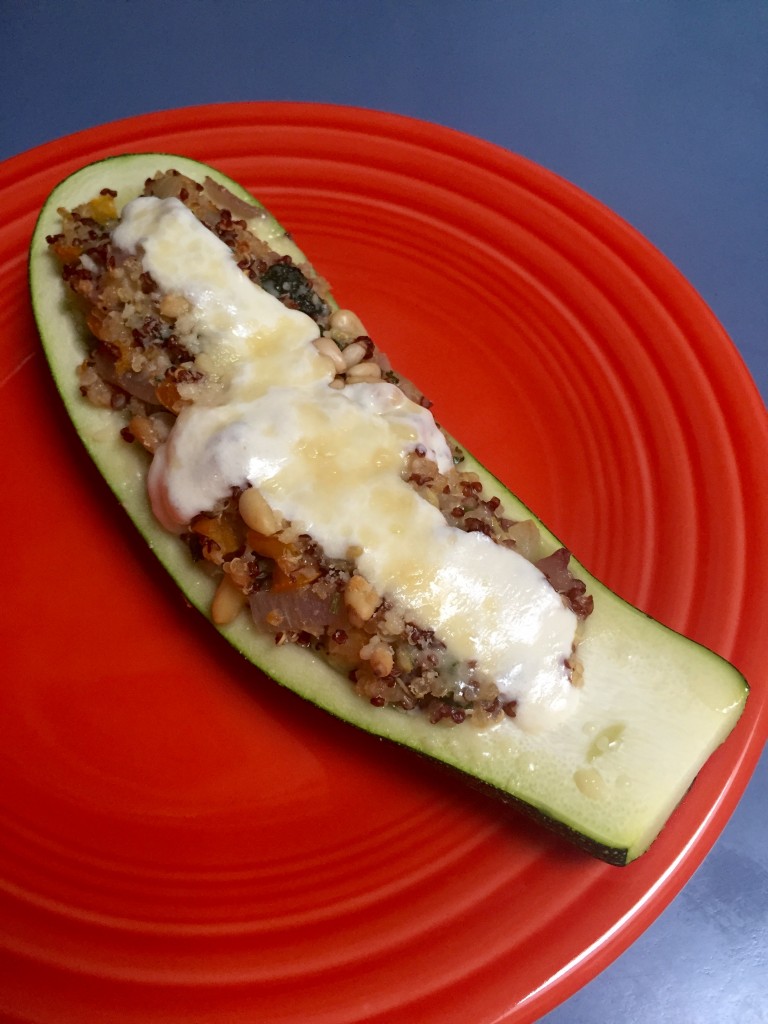
Zucchini Stuffed Quinoa Boats
Summer is here and if you have planted a vegetable garden you may be harvesting the first crop of zucchini, peppers and tomatoes. 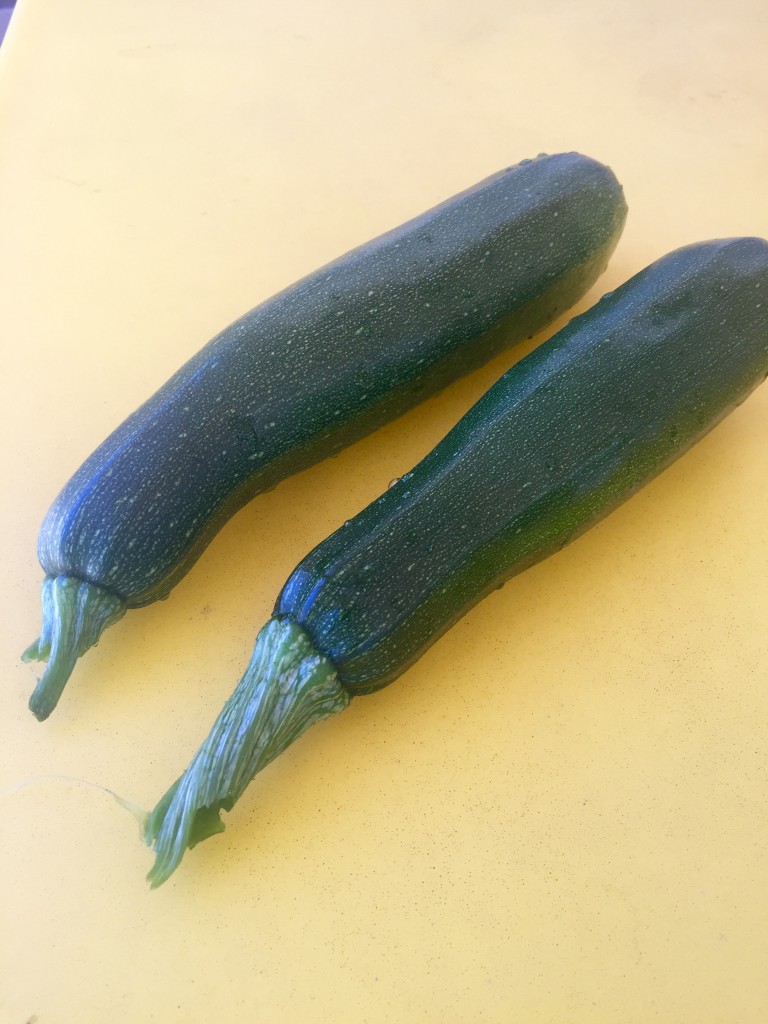 Here is a delicious way to serve zucchini. These stuffed zucchini quinoa boats can be your side dish with turkey burgers or chicken on the grill or you can eat them as your main dish because they are packed with protein and veggies.
Ingredients
6 medium zucchini (3 large zucchini forgotten in the garden for a few days)
2 Tablespoons olive oil
2-3 cloves garlic smashed
1 onion finely diced
1 yellow or orange bell pepper finely diced
2 roma tomatoes or 1 large tomato chopped
1 ½ teaspoons salt
1 teaspoon pepper
2 sprigs of fresh thyme chopped fine (2 teaspoons dried thyme)
2 cups chopped fresh spinach
4 basil leaves chopped
3 cups cooked quinoa (I used red quinoa)
½ cup grated parmesan
½ cup grated mozzarella
¼ cup pine nuts
Wash and cut the zucchini in half lengthwise. Scoop out the center portion of each half zucchini and dice up what you have scooped out.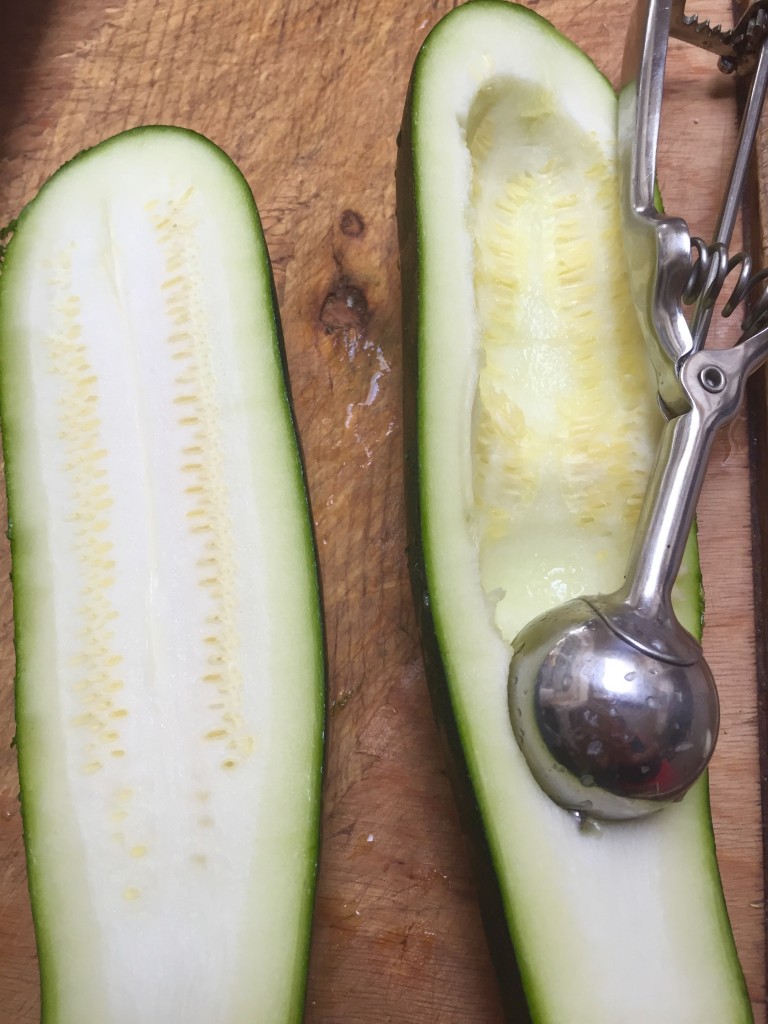 Saute garlic and onions in olive oil. Add peppers, tomatoes and chopped zucchini and stir until all vegetables are soft. Add thyme, salt, pepper, chopped spinach and basil and cook for 2-3 minutes. Remove from heat and add cooked quinoa and parmesan cheese and stir until blended.
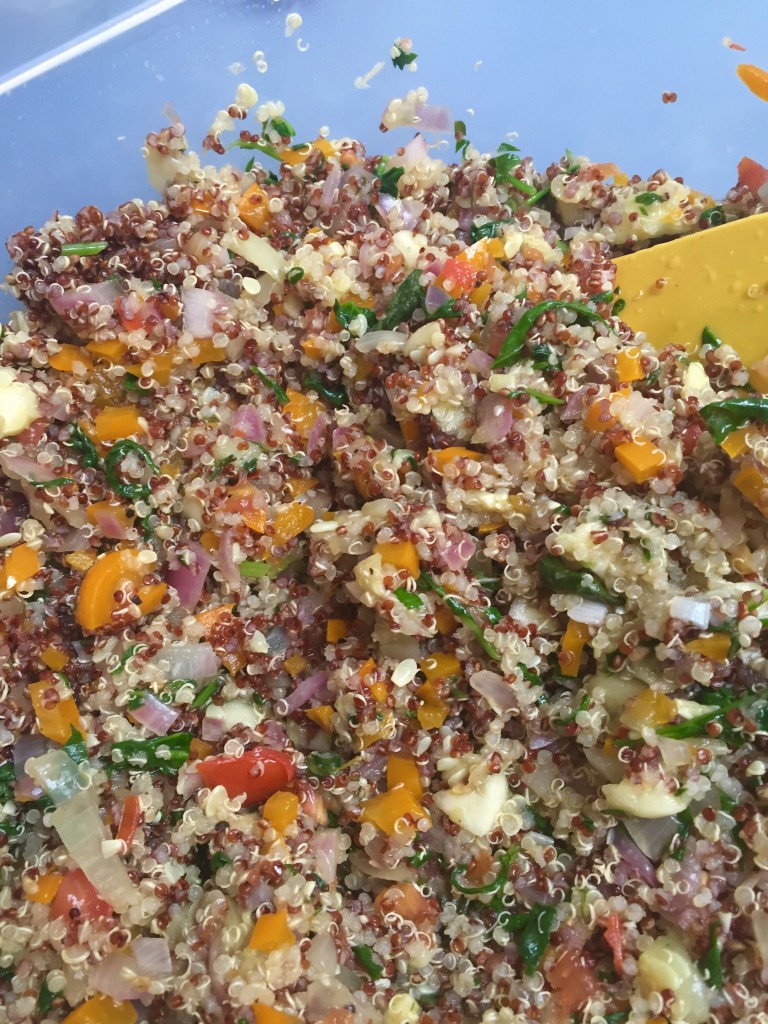
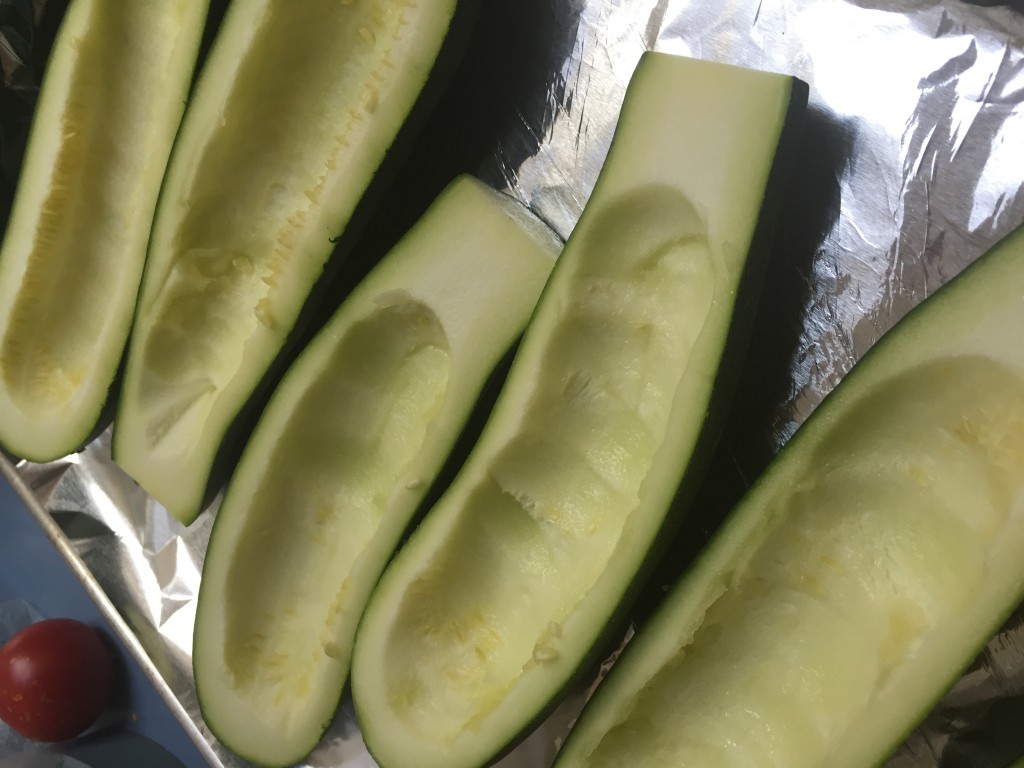 Fill zucchini boats full of the quinoa mixture and sprinkle pine nuts on top.
 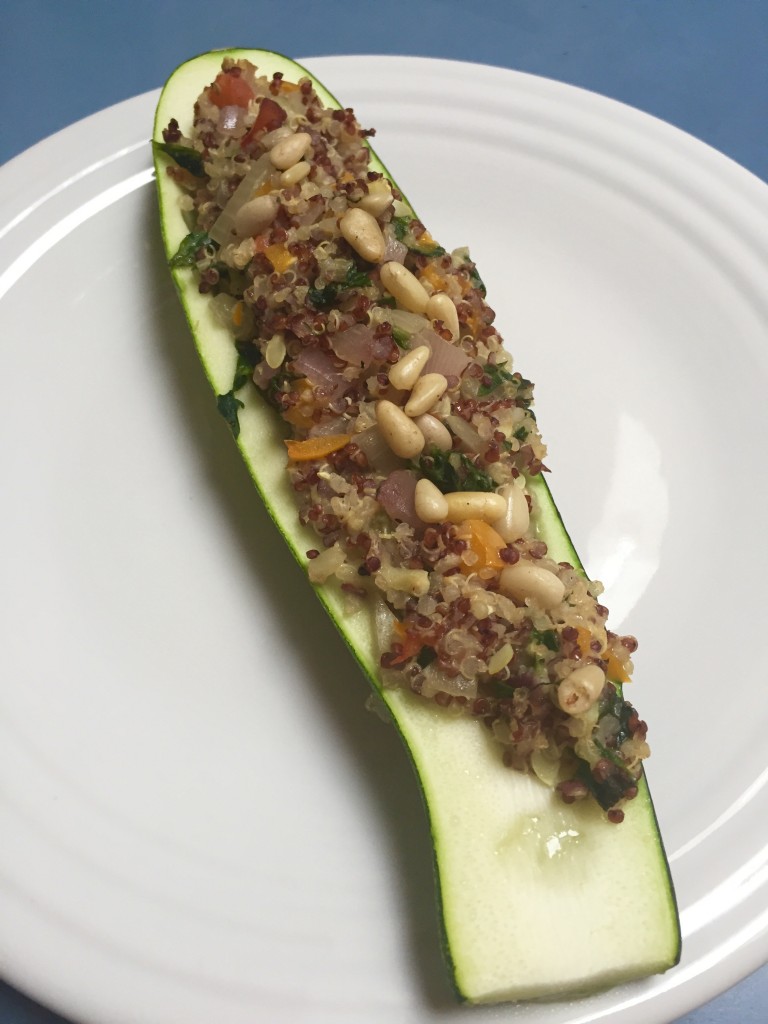 Bake in 375 degree oven for 30-45 minutes depending on the size of your zucchini. Sprinkle grated or sliced mozzarella cheese on top and bake for 5 minutes more until cheese is melted. Serve and enjoy!!!
Cowboy Caviar with a Twist
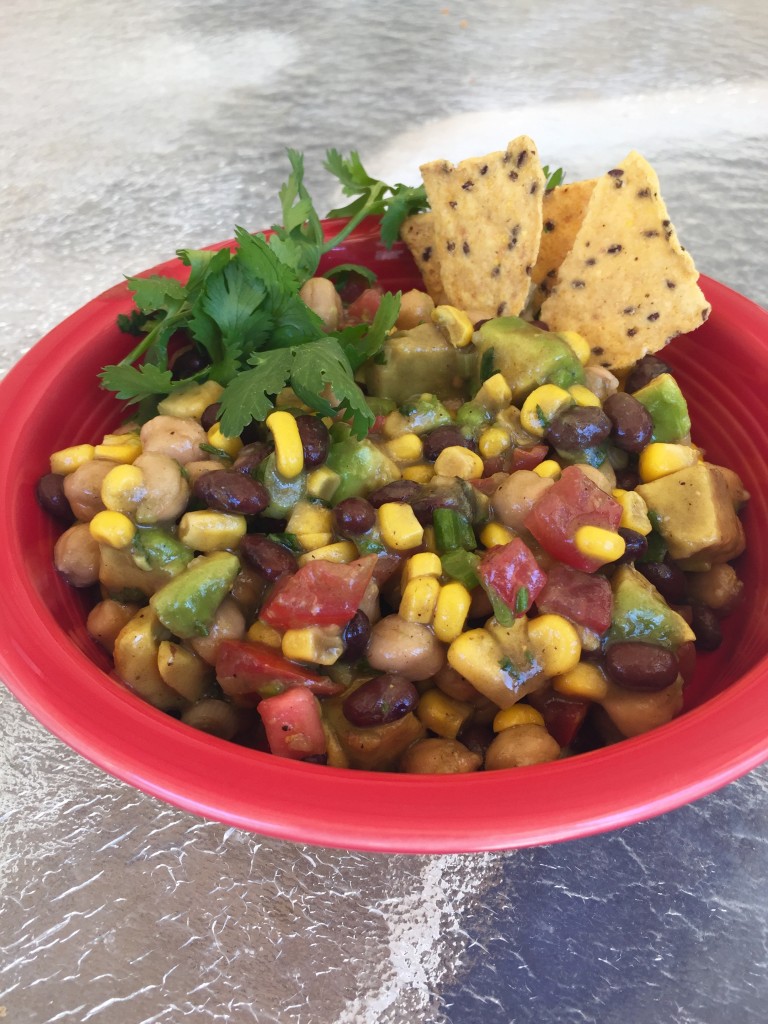
Memorial Day BBQ’s are the BEST when everyone brings one of their favorite dishes to share. Yesterday my mom brought some Cowboy Caviar and it was SCRUMPTIOUS. She added a special ingredient that made it better than ever! Set a bowl of this fun appetizer out and it will be gobbled up.
Ingredients
2 tomatoes seeded and chopped
1 small bunch of green onions chopped
⅔ cups cilantro chopped
1 can corn drained and rinsed (2-3 ears of bbq corn cut off cob)
1 can black beans drained and rinsed
1 can garbanzo beans drained and rinsed (most recipes call for pinto beans but we like the garbanzo beans for a new twist)
2 avocados chopped
Dressing
¼ cup olive oil
¼ cup red wine vinegar
2 cloves garlic smashed
1 teaspoon salt
1 teaspoon cumin
¼ teaspoon pepper
⅛ teaspoon sugar
Mix all dressing ingredients and let dressing sit until all vegetables and beans are chopped and mixed together. Toss dressing over bowl of vegetables and salad. Place in a serving dish and serve with tortilla chips. This can also be a wonderful side dish for a mexican dinner-enchilladas, burritos, fajitas. You can use leftovers the next day rolled in a tortilla that has been warmed with a bit of cheese sprinkled on top. Enjoy!
- 2 tomatoes seeded and chopped
- 1 small bunch of green onions chopped
- ⅔ cups cilantro chopped
- 1 can corn drained and rinsed (2-3 ears of bbq corn cut
Gluten Free Chocolate Chip Cookies
For some of our friends and loved ones, the days of delicious chocolate chip cookies like grandma used to make seem to be a long ago luxury, never to be enjoyed again. During this “Clean Eating” month I have been searching for an option for those who need to be gluten free for whatever reason when it comes to their clean eating desserts. I started by researching recipes for homemade gluten free flours and found two that sounded quite reasonable. I will share both of them with you and the sites where I found them so you can do your own evaluation. In the end I happened to have one bag of “Bob’s Red Mill” Gluten Free All Purpose Flour on hand so I used it today in my recipe for the sake of time and convenience.
I adapted a recipe I found online from Michelle@MyGluten-freekitchen.com
Ingredients
2 ¼ cups gluten free flour blend
½ teaspoon xanthan gum (omit if Gluten Free flour blend you are using already has xanthan in the recipe)
1 ¼ teaspoon baking soda
1 teaspoon salt
¾ cup butter melted
2 ounces cream cheese, room temperate
1 ¼ cup packed brown sugar
¼ cup white sugar
2 teaspoons vanilla
2 egg yolks, room temperature
1 cup dark chocolate chips
1 cup semisweet chocolate chips
In a medium bowl, whisk together gluten free flour, xanthan gum, baking soda and salt. In your mixer bowl, put cream cheese and melted butter and begin to mix. Add brown and white sugar and blend on medium speed for 2 minutes. Add the egg yolks and vanilla and mix until well blended. Add the flour mixture and blend on low until just mixed. Add the chocolate chips and mix in by hand. Cover the cookie dough with saran wrap and …
Read MoreHomemade Applesauce-Clean Eating Style
A great dessert or snack or breakfast treat. When you have a daughter that lives near Apple Hill and she calls to say a 40 pound box of apples is $14 you jump at the opportunity to share a box. Even though it took me a few weeks to pick up my apples, and they did not look as fresh as they had, I knew I was going to make applesauce so the appearance of the apples was not a deterrent. I set aside a morning to have fun in the kitchen making the applesauce and it went so fast, I was done in under 2 hours.
Ingredients
20 apples (about 8 pounds of apples-I used golden delicious and granny smith)
2 whole cinnamon sticks
1 lemon peel grated off
4 tablespoons lemon juice (2 lemons juiced)
⅓ cup honey (original recipe calls for ¼ cup brown sugar and ¼ cup white sugar)
1 cup water
¼ teaspoon salt

If you have a vintage cone shaped food mill you can make your applesauce without peeling your apples. To purchase one click here. Otherwise, peel, core and chop the apples. Place into a big pot with all the ingredients and bring to a boil. Lower the heat and simmer for 30 minutes until the apples are soft. If you have a food mill put 2 cups of apples at a time into collander and press applesauce through the strainer with the pestle. Place applesauce into 1 quart Ball jars and seal according to canning directions or place in refrigerator and use up within 2 weeks. My recipe made 3 quarts.

I love homemade applesauce with plain yogurt as a wonderful snack or dessert. YUMMY!
What is one of your favorite healthy desserts?
 …
…
An Egg-cellent Egg Hunt
If you are going to include an egg hunt in your Easter celebration and you have a wide age span of egg hunters…here is a fantastic, organized and creative way to do your egg hunt. (This is a family tradition in my SIL’s family) They hosted an Easter celebration yesterday and I was able to witness this ingenious idea first hand.
Supplies Needed
1 Easter egg basket per person
1 paper bag per person lunch-sack sized paper bag-(Spring/Easter designed bags make it more fun)
16 plastic eggs per person (different colors for each child necessary-you can split the egg colors for example half yellow/half green and half green/half purple and half purple/half yellow)
fun treats for kids…small boxes of raisins, M & Ms, gummy worms, jelly beans, fruit snacks and any other of your favorite Easter candy treats.
Fill the plastic eggs with treats. Put one paper bag and one egg into each basket (a different color in every basket) Have the kids go into a part of the yard or house where they can not see, as the egg hiders do their job. Have the egg hunters line up from youngest to oldest. Hand out the baskets and explain to the children that they ONLY HUNT for the egg color in their basket. Reassure the kids that everyone will be finding the same number of eggs so they should pass up all eggs that are not their color and let the other kids find their own colored eggs. The kids at our party seemed to really understand this concept and once they had found their own 15 eggs they began to help the younger children find their last ones. After all the eggs had been found. The parents helped empty the contents of the eggs into the paper …
Read MoreBaked Oatmeal Carrot Muffins
Bekah and I made these muffins last week and they were a perfect treat for breakfast or for a snack. We liked the extra nutrition provided by the grated carrots. (I made a batch with grated zucchini as well-you have to let the grated zucchini weep for about 15 minutes on paper towels to absorb the extra moisture.) The carrots were a fun addition to this delicious and nutritious gluten free, vegetarian muffin. You feel like you are eating a bowl of oatmeal with yummy toppings packed into a muffin. A wonderful accompaniment to serve for an Easter breakfast/brunch.
Ingredients
2 ripe bananas
1 ½ cups old fashioned oats
2 Tablespoons chia seed
2 Tablespoons hemp seed
¾ cups milk (I used almond milk)
⅓ cup almond butter
⅛ cup honey
1 teaspoon vanilla
¼ teaspoon salt
1 egg
1 teaspoon baking powder
2 teaspoons cinnamon
¾ cup grated carrots
½ cup raisins
¼ cup chopped pecans
In a large bowl, mash the bananas. Add the oats, chia seeds, hemp seeds and milk and let sit for 5 minutes. Stir in the almond butter, honey and vanilla. Beat the egg and add to the mixture along with the salt, baking powder and cinnamon. Fold in the carrots, raisins and pecans.
Lightly grease 12 muffins tins or use cute muffin papers. Fill muffin cups almost to the top. Bake in a 375 degree oven for 20-25 minutes.
- 2 ripe bananas
- 1 ½ cups old fashioned oats
- 2 Tablespoons chia seed
- 2 Tablespoons hemp seed
- ¾
Resurrection Eggs-DIY with your Kids or Grandkids
I am always looking for creative ways to incorporate the gospel message into activities with my grandchildren. When my own girls were young, I listened to Family Life Today and Focus on the Family faithfully every day. Often times they had great ideas of how to teach your kids about important bible concepts in fun ways. I remember buying a set of Resurrection Eggs and using them every Easter to remind all of us of the significance of this season and to remind us of all that Jesus went through as He suffered and died for us. Now that I have a little bit more time to get creative…I thought it would be fun to put together homemade Resurrection Egg Kits for the grandkids and take them with me to do together as a fun activity. I started by printing this Resurrection eggs free printable and then gathered my supplies and the next time I see the kiddos, I will have my DIY Resurrection kit all ready to be assembled. Here is what you need.
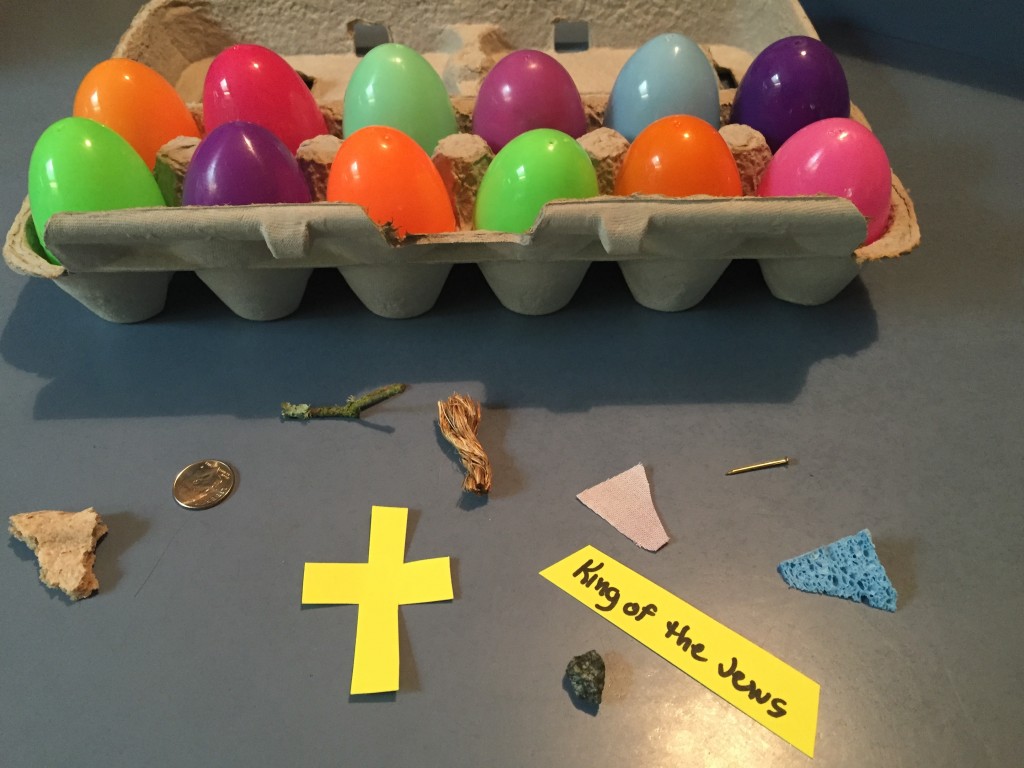

1 empty egg carton
12 small plastic eggs
resurrection eggs free printable
silver coin
piece of rope
thorn
stone
piece of purple fabric
small sign “King of the Jews”
cross
nail
cloves
sponge
small piece of bread or oyster cracker
scissors
sharpies
extra construction paper in various colors
Print your own verses to put into your resurrection eggs. Gather your supplies. Pick one of the children to cut the printable verses up into 12 individual slips of paper. Have another child fold the paper slips up so they fit into the eggs. Have one of the children write numbers 1 through 12 on the eggs. Engage the children in the activity of filling the eggs with the supplies and match the verses with the …
Read MoreBunny Cakes for Breakfast
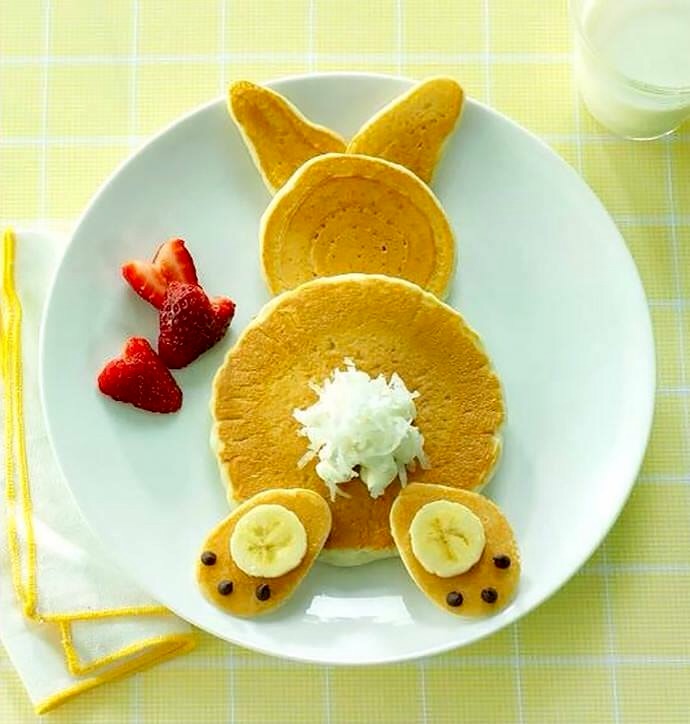
Looking for a fun and easy breakfast to serve on Easter morning or sometime in the weeks leading up to Easter, to get in the mood for Easter Sunday. Here is my grandmother’s famous buttermilk pancake recipe that she made for us and served every Saturday or Sunday morning when we had the privilege of spending the weekend in one of my favorite places growing up. She was a fabulous cook and everything she created had a certain extra special flair and each dish holds precious memories for me. Rachel took this recipe and turned it into a fun holiday treat for her girls. Read on to see how to turn this buttermilk pancake recipe into “Bunny Cakes”.
Ingredients
2 eggs
2 ½ cups buttermilk
2 cups flour
1 teaspoon baking soda
1 teaspoon baking powder
1 teaspoon salt
1 teaspoon sugar
Accessories for Bunny Cakes
½ cup shredded coconut
1 banana sliced thin
¼ cup mini chocolate chips
sliced strawberries
Measure dry ingredients into a medium sized bowl. in your kitchen aid of mixer bowl, beat eggs until foamy. Add buttermilk alternately with dry ingredients. Mix on medium-low until batter is smooth. Cook on a hot lightly greased griddle.
To make Bunny Cakes, make one circle pancake 4 inches in diameter, one circle pancake 2 inches in diameter, 2 oval pancakes that are about 1-1 ½ inches long and 2 triangular pancakes about 1-1 ½ inches in length. Assemble bunnies on separate plates with triangle ears down first, then small circle, then large circle and them paws n top according to photo below. Decorate with coconut, bananas, mini chocolate chips and strawberries. Enjoy!
Planting Jelly Beans in Home Grown Easter Grass
Here is an Easter project that is easy and fun for your family and can utilize some learning concepts outside of the typical “Easter Bunny” activities.
Supplies needed
Jelly beans or M & Ms in assorted pastel colors
tootsie roll pops, colored lollipops, blow pops or peeps
small metal, clay or glass containers
potting soil
small pebbles
wheat seed (hard red wheat is best for growing grass)
saran wrap
To grow your home grown wheat grass, select your container and gather your other supplies. You can get creative with choosing your containers. Look around your house and garage and see what you have. Or make a quick trip to Goodwill, the Dollar Store, your local hardware store or Target to pick up some containers.
Metal containers or clay pots found in the gardening section work great. Clay pots have a hole in the bottom so you will need some type of plastic liner in the bottom so you don’t have to worry about the water or the dirt getting on your table. You can purchase it in the bulk food section of the grocery store. Hard red wheat works best.
After selecting your container, add a layer of pebbles in the bottom of each container. Because your Easter grass grows for such a short time, drainage isn’t crucial but I do like to add a layer of small pebbles in my containers to help with drainage. Nest, fill each container with potting soil and then a layer of wheat seeds. Sprinkle the top of each container with water (don’t drown the poor little seeds). Then cover each container with some plastic wrap and then place in a sunny window. You will want to make sure that the soil stays moist, (not wet) so that the seeds can germinate. The plastic …
Read MoreAmerican Sukiyaki
Asian food is wonderfully healthy. An authentic Japanese diet is composed of fresh vegetables, lean meats, fish and tofu and rice. When I was growing up, my mom loved to serve international dinners for our family. She created this easy sukiyaki recipe that became a favorite at our home. We named the recipe American Sukiyaki (probably politically incorrect in this day and age) because it had a similarity to the Japanese dish with an American flair. It is so easy to make and really yummy. When you need a quick dinner that gives you an extra dose of iron and beef protein, this is the recipe to try.
Ingredients
1 lb lean top round steak thinly sliced
1 Tablespoon olive oil
2 medium onions thinly sliced
1 garlic clove smashed
1 Tablespoon soy sauce
½ teaspoon sugar or honey
1 (16-20 oz) package of frozen FRENCH CUT STYLE green beans
2 (15 oz) cans stewed tomatoes
1 cup rice cooked according to package (we use Hinode short grain rice for authentic sticky rice)
 Brown thinly sliced beef in olive oil on high in a large skillet (I use an electric fry pan on 400 degrees). When browned but not cooked all the way through, add the onions, garlic, soy sauce and sweetener.
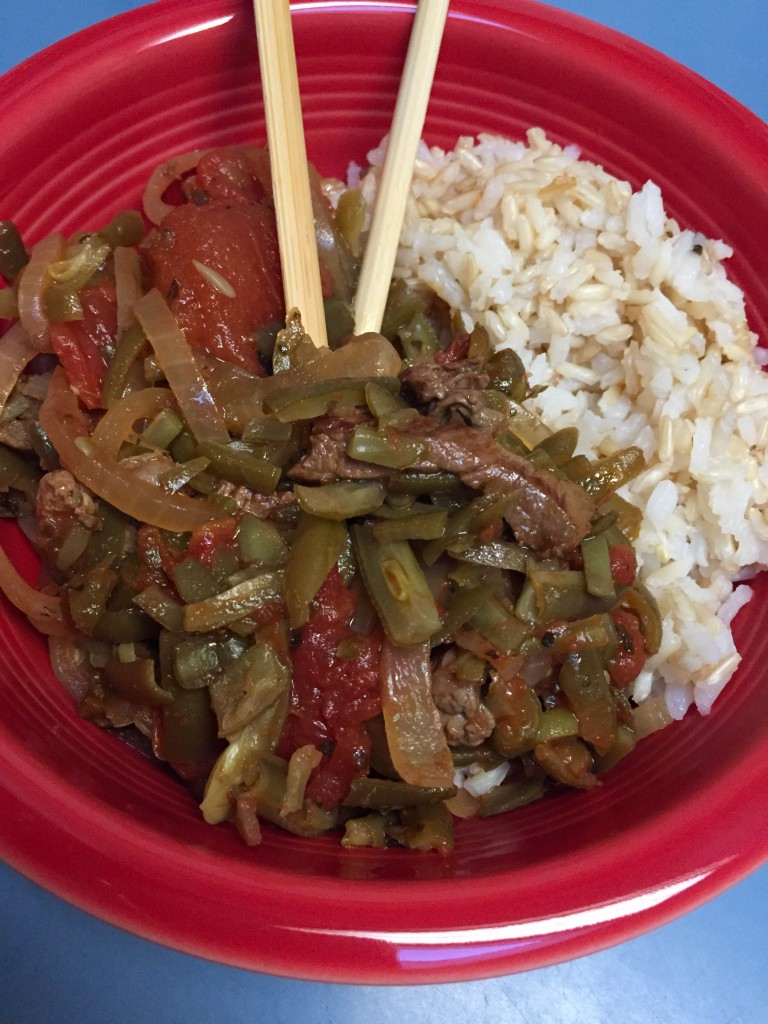
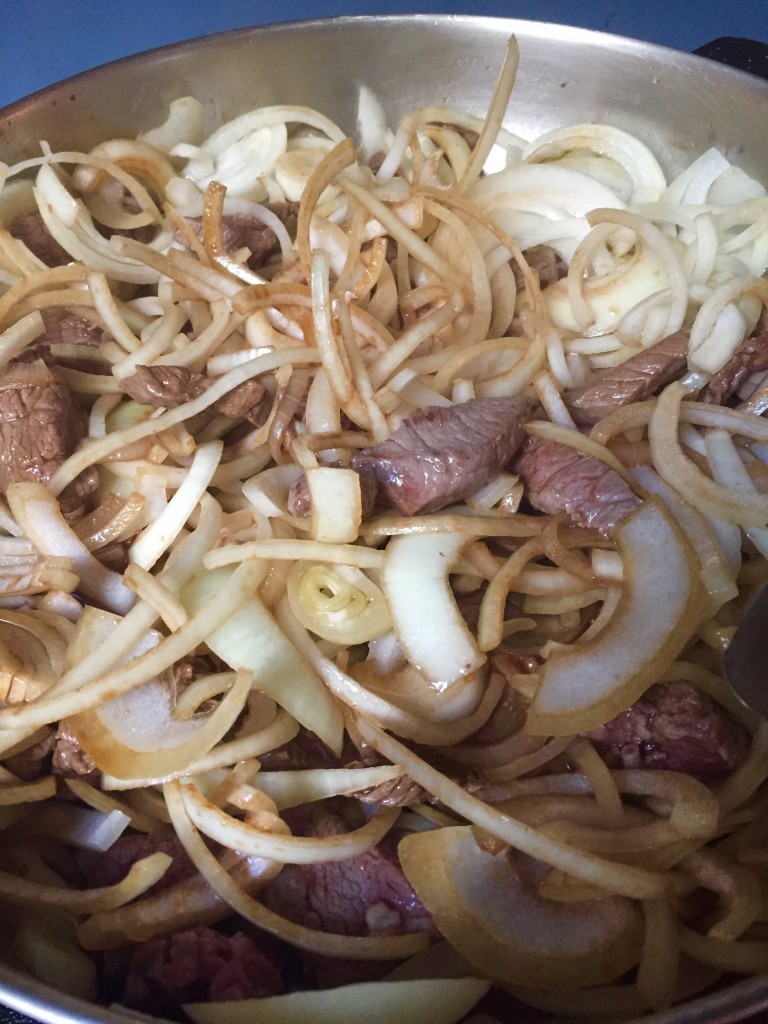 Stir until onions start to soften about 2 minutes. Turn to medium (325 degrees for fry pan) and add bag of frozen green beans and stewed tomatoes. Stir once or twice, cover and simmer for 30 minutes. Serve over rice.
- 1 lb